SD-FORGE EXTENSION
/r/StableDiffusion/comments/1sjty9x/sdforge_extension/
https://redd.it/1sjtyrz
@rStableDiffusion
/r/StableDiffusion/comments/1sjty9x/sdforge_extension/
https://redd.it/1sjtyrz
@rStableDiffusion
Reddit
From the sdforall community on Reddit: SD-FORGE EXTENSION
Posted by BusBackground5847 - 1 vote and 0 comments
This media is not supported in your browser
VIEW IN TELEGRAM
Me whenever people on the PC building subreddits ask me why I need >32GB of system RAM.
https://redd.it/1sjsvjk
@rStableDiffusion
https://redd.it/1sjsvjk
@rStableDiffusion
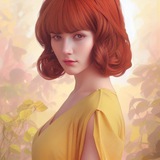
Does anyone know which model and potentially Lora was used to create these?
https://redd.it/1sjv1ga
@rStableDiffusion
https://redd.it/1sjv1ga
@rStableDiffusion
Reddit
From the StableDiffusion community on Reddit: Does anyone know which model and potentially Lora was used to create these?
Explore this post and more from the StableDiffusion community
This media is not supported in your browser
VIEW IN TELEGRAM
IC-LoRA-Detailer: It's for post-processing, not just rendering (LTX2.3)
https://redd.it/1sjxoz6
@rStableDiffusion
https://redd.it/1sjxoz6
@rStableDiffusion
Haven't had more fun than today with subgraphs - Subgraphs are awesome!!!
https://redd.it/1sjs2bq
@rStableDiffusion
https://redd.it/1sjs2bq
@rStableDiffusion
Reddit
From the StableDiffusion community on Reddit: Haven't had more fun than today with subgraphs - Subgraphs are awesome!!!
Explore this post and more from the StableDiffusion community
Used LTX 2.3 anchor frame injection to maintain brand consistency across AI video — before/after
Working on a brand campaign where consistency was everything — same can, same character, same lighting across all assets including video.
The main technique I used was anchor frame injection through using LTXV guides over inplace. Three reference frames injected at key points in the timeline:
a starting frame to lock the logo specifically,
a mid-point "consistency anchor" at frame 138 to bridge the gap, the guide is set low and the anchor image is designed with high almost flat contrast in key areas
and a hard end frame at reference strength 0.7 to leave enough room for natural movement.
Combined with canny edges, depth map, and pose estimation as control references.
The before GIF is the raw output. The after is the rerender with the anchor method applied.
The environment cleaned up significantly. One thing LTX over-interpreted was the walk — it added a fluidity that felt more runway than competitive player. Tighter pose constraints next pass.
Full case study in comments.
https://i.redd.it/fj2pl5covwug1.gif
https://i.redd.it/p0ubkd5pvwug1.gif
https://redd.it/1sk4051
@rStableDiffusion
Corridor Crew green/blue screening tool: Corridor Key
https://www.youtube.com/watch?v=Y3Dfw969itU
https://redd.it/1sk74mz
@rStableDiffusion
https://www.youtube.com/watch?v=Y3Dfw969itU
https://redd.it/1sk74mz
@rStableDiffusion
YouTube
I accidentally started a green screen revolution...
Squarespace ► Head to http://squarespace.com/corridorcrew to save 10% off your first purchase!
Our videos are made possible by Members of CorridorDigital, our Exclusive Streaming Service! Try a membership yourself with a 14-Day Free Trial ► http://cor…
Our videos are made possible by Members of CorridorDigital, our Exclusive Streaming Service! Try a membership yourself with a 14-Day Free Trial ► http://cor…
LTX2.3 (Distilled) - Updated sigmas for better results (?)
Hey y'all,
Was playing around with the LTX2.3 distilled sigmas for the first Ksampler and tried to tweak them for a bit of fun, and I think I've stumbled upon updated sigmas that give me better quality, detail and prompt adherence.
I've been using LTX2.3 since it came out and never really questioned the "official" sigmas that come with the original workflow, but today, for fun, I tried to tweak them a bit and I'm really liking the results I am getting.
This is all T2V and I have not tried with I2V, so not sure how it would affect the results there.
The original Sigmas for the first Ksampler (8 steps) are: 1.0, 0.99375, 0.9875, 0.98125, 0.975, 0.909375, 0.725, 0.421875, 0.0
After a bit of testing, I've settled on these new sigmas: 1.0, 0.995, 0.99, 0.9875, 0.975, 0.65, 0.28, 0.07, 0.0
I have made some comparisons that showcase the difference between both old and new sigmas, and I am really liking how things turn out with the new ones.
All results are 1280 x 704 x 24FPS, 5 seconds, Euler A sampler (16GB of VRAM so excuse the lower quality, also Reddit compression hurts a lot).
Left is with old sigmas, right is with new sigmas.
Sounds is from the video with the new sigmas.
https://reddit.com/link/1sk8vhq/video/7gsjvdn15yug1/player
a muscular man with rolled-up sleeves and a leather apron leans over a metal workbench in a dimly lit industrial workshop, he presses an angle grinder against a large piece of steel, a cascade of bright orange and white sparks erupts and scatters across the floor, his forearms flex with the effort, face partially lit by the sparks and harsh overhead workshop lamp, sawdust and metal shavings on the floor, dark gritty background with shelving and hanging tools slightly out of focus, cinematic, shallow depth of field, photorealistic
Streamable link: *https://streamable.com/rwt3vl*
https://reddit.com/link/1sk8vhq/video/yn1qv1g55yug1/player
a heavily muscular man with short cropped hair and scarred knuckles wraps his hands in a dimly lit boxing gym, then steps up to a heavy bag and throws a hard combination of punches, the bag swings violently, sweat flying off his arms with each impact, harsh overhead fluorescent light, cinematic, photorealistic
Streamable link: *https://streamable.com/36b5nx*
https://reddit.com/link/1sk8vhq/video/a4ougyv17yug1/player
In a dark theater room, a ballerina wearing a typical ballerina outfit is dancing, moving gracefully on the stage. A spotlight is focused on her.
Streamable link: *https://streamable.com/jwey0a*
https://reddit.com/link/1sk8vhq/video/p8ip8l5d5yug1/player
a tall dark-haired muscular man in a fitted black shirt behind a moody speakeasy bar grabs a shaker, tosses it spinning in the air, catches it smoothly and slams it on the bar, then leans forward on both hands looking directly into camera, neon backlit bottles, dark atmospheric lighting, cinematic, photorealistic
Streamable link: *https://streamable.com/qhycpa*
https://reddit.com/link/1sk8vhq/video/belte2og5yug1/player
A beautiful woman with long blonde hair, wearing a long white dress flowing in the wind is walking by a cliff, looking ethereal, looking in the distance. The sound of waves crashing down below can be heard. She is barefoot, walking through tall grass. The sun is casting beautiful lights and shadows on the scene.
Streamable link: *https://streamable.com/hz2fu5*
These are just some short examples which weren't cherry picked.
Not sure what this is worth, but thought I would share.
https://redd.it/1sk8vhq
@rStableDiffusion
Reddit
From the StableDiffusion community on Reddit
Explore this post and more from the StableDiffusion community
Inpaint workflows for z-image, qwen and flux fill onereward
Hi!
A couple of days ago I uploaded and shared here my 2 edit/inpaint workflows plus a z-image txt/img2img one.
Well, today I have uploaded the rest of the workflows I personally use, everything else I use is simple enough that it is not worthy to share.
I also updated the Z-Image txt/img2img workflow, as it was missing the functionality to use a denoise lower than 1.
What I have newly uploaded are 3 traditional inpaint workflows:
- An update to my previous Flux Fill workflow, this one is what I use nowadays, I only use the onereward fine-tune and I also trimmed some methods I don't use anymore. So I left the previous version uploaded in case someone want the full version.
- A Z-Image based version of the same inpaint logic as the Flux one, with the proper changes for the specific model.
- Same with Qwen Image. Note that there are the Qwen Image Edit based edit/inpaint workflow I previously uploaded and this one; based on Qwen Image and InstantX controlnet for traditional inpaint. In some cases is better to use an editing/inpaint approach and others pure inpant, so you have both options.
What makes my inpaint workflows different? Well, I haven't checked all inpaint workflows out there, but so far I have seen that:
- Default templates or example workflows straight use the full image, without crop&stitch logic, that is practically useless.
- Most user's inpaint workflows follow the crop-resize-sample-resize-paste logic, as do mine. But, most people use the inpaint crop&stitch custom nodes, which are great, as they are an easy to use all in one solution to do the aforementioned pipeline.
I use the old masquerade nodes, which separates all functions in individual nodes, allowing for a greater control of how the cropping is done, of course it is a bit of a pain to setup, but I already done that for you. So the cropped region aspect ratio is calculated in base of the mask shape, it is scaled to a total pixels size, which makes more comfortable to match the model optimal resolution, and you get some extra outputs to work with. It is all packed into a sub-graph, with the advantage of being able to dive in and debug should the behavior needed to be tweaked for some special case. Add to that a centralized control panel and a selection of specific sampler/scheduler nodes for each model, everything group-ordered and comments and usage notes.
As always, my hope is that they serve you as good as they serve me.
They are all here: https://ko-fi.com/botoni/shop/workflow
Free and no login necessary, it asks for an e-mail, but it won't check if it exists. If you put your real one it should notify of workflow updates and new posts.
https://redd.it/1ska9uv
@rStableDiffusion
Ko-fi
Botoni's Shop is Open!
I've opened a shop. Come take a look!
Z Image Turbo + GrainScape UltraReal + American Consistent Character
https://redd.it/1skbvr4
@rStableDiffusion
https://redd.it/1skbvr4
@rStableDiffusion
Reddit
From the StableDiffusion community on Reddit: Z Image Turbo + GrainScape UltraReal + American Consistent Character
Explore this post and more from the StableDiffusion community