The life cycle of creating a website involves a series of key stages, each contributing to the successful launch of the final product. Here's a typical overview of the web development life cycle:
### 1. Planning
- Requirements Gathering: Identify the purpose of the website, the target audience, and specific features or functionalities required.
- Scope Definition: Outline the project scope, goals, features, budget, timeline, and deliverables.
- Team Assignment: Assign roles, such as project manager, designers, developers, and content creators.
- Technical Feasibility: Assess the technical requirements, tools, and technology stack for the project.
### 2. Analysis and Design
- Content Planning: Decide what content will be needed for the website and how it will be structured.
- Wireframes and Prototypes: Create basic sketches (wireframes) to visualize the layout and structure of web pages.
- User Experience (UX) Design: Focus on the user's journey and navigation across the website.
- User Interface (UI) Design: Design the visual aspects of the site, including colors, typography, and branding.
### 3. Development
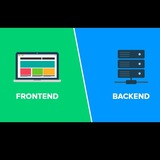
- Frontend Development: Use technologies like HTML, CSS, and JavaScript to create the user-facing portion of the website.
- Backend Development: Build the server-side logic, databases, and APIs. This can involve programming languages like PHP, Python, Java, Node.js, etc.
- CMS Integration: If required, integrate a content management system (CMS) like WordPress to facilitate content management.
- Database Configuration: Set up databases to store dynamic data needed by the website.
- Responsive Design: Ensure the website works on various devices (desktop, tablet, mobile).
### 4. Testing
- Functional Testing: Verify that all features and functions work as expected.
- Usability Testing: Test the user interface and overall experience to ensure that it’s intuitive and user-friendly.
- Compatibility Testing: Ensure the website works across different browsers and devices.
- Performance Testing: Evaluate the website's loading speed and responsiveness.
- Security Testing: Look for potential vulnerabilities and implement measures to protect against security threats.
### 5. Deployment
- Hosting: Purchase and set up hosting for the website. Choose between shared hosting, VPS, cloud hosting, etc., depending on project needs.
- Domain Name: Register a domain name and link it to the hosting server.
- Final Checks: Conduct a final review to make sure everything works well on the live environment.
- Launch: Publish the website and make it available to users.
### 6. Maintenance
- Content Updates: Regularly update content to keep the website relevant and engaging.
- Bug Fixes: Continuously fix any bugs or errors reported by users.
- Security Updates: Apply security patches and updates to protect the site from vulnerabilities.
- Performance Monitoring: Use analytics tools to track performance and user behavior, optimizing the site when necessary.
- Backup and Disaster Recovery: Regularly back up the site to prevent data loss in case of any issues.
### 7. Iteration and Improvement
- User Feedback Collection: Collect feedback from users to identify areas for improvement.
- A/B Testing: Test different versions of web pages to determine which design or functionality best meets users’ needs.
- New Features: Based on feedback and business requirements, plan for adding new features or making major changes.
- Search Engine Optimization (SEO): Implement SEO best practices to ensure the website ranks well on search engines and attracts more organic traffic.
### 1. Planning
- Requirements Gathering: Identify the purpose of the website, the target audience, and specific features or functionalities required.
- Scope Definition: Outline the project scope, goals, features, budget, timeline, and deliverables.
- Team Assignment: Assign roles, such as project manager, designers, developers, and content creators.
- Technical Feasibility: Assess the technical requirements, tools, and technology stack for the project.
### 2. Analysis and Design
- Content Planning: Decide what content will be needed for the website and how it will be structured.
- Wireframes and Prototypes: Create basic sketches (wireframes) to visualize the layout and structure of web pages.
- User Experience (UX) Design: Focus on the user's journey and navigation across the website.
- User Interface (UI) Design: Design the visual aspects of the site, including colors, typography, and branding.
### 3. Development
- Frontend Development: Use technologies like HTML, CSS, and JavaScript to create the user-facing portion of the website.
- Backend Development: Build the server-side logic, databases, and APIs. This can involve programming languages like PHP, Python, Java, Node.js, etc.
- CMS Integration: If required, integrate a content management system (CMS) like WordPress to facilitate content management.
- Database Configuration: Set up databases to store dynamic data needed by the website.
- Responsive Design: Ensure the website works on various devices (desktop, tablet, mobile).
### 4. Testing
- Functional Testing: Verify that all features and functions work as expected.
- Usability Testing: Test the user interface and overall experience to ensure that it’s intuitive and user-friendly.
- Compatibility Testing: Ensure the website works across different browsers and devices.
- Performance Testing: Evaluate the website's loading speed and responsiveness.
- Security Testing: Look for potential vulnerabilities and implement measures to protect against security threats.
### 5. Deployment
- Hosting: Purchase and set up hosting for the website. Choose between shared hosting, VPS, cloud hosting, etc., depending on project needs.
- Domain Name: Register a domain name and link it to the hosting server.
- Final Checks: Conduct a final review to make sure everything works well on the live environment.
- Launch: Publish the website and make it available to users.
### 6. Maintenance
- Content Updates: Regularly update content to keep the website relevant and engaging.
- Bug Fixes: Continuously fix any bugs or errors reported by users.
- Security Updates: Apply security patches and updates to protect the site from vulnerabilities.
- Performance Monitoring: Use analytics tools to track performance and user behavior, optimizing the site when necessary.
- Backup and Disaster Recovery: Regularly back up the site to prevent data loss in case of any issues.
### 7. Iteration and Improvement
- User Feedback Collection: Collect feedback from users to identify areas for improvement.
- A/B Testing: Test different versions of web pages to determine which design or functionality best meets users’ needs.
- New Features: Based on feedback and business requirements, plan for adding new features or making major changes.
- Search Engine Optimization (SEO): Implement SEO best practices to ensure the website ranks well on search engines and attracts more organic traffic.
### Summary
1. Planning: Set goals, understand the audience, and define requirements.
2. Analysis and Design: Design the layout, UX, and UI.
3. Development: Write the code, integrate CMS, and develop the front and backend.
4. Testing: Check functionality, usability, compatibility, security, and performance.
5. Deployment: Host the website, link the domain, and launch it.
6. Maintenance: Update content, fix bugs, monitor security, and maintain backups.
7. Iteration: Gather user feedback and continue making improvements over time.
Creating a website is an iterative process that involves ongoing development and optimization to ensure the website meets the user's needs and evolves according to business goals.
#web #website #life #cycle #pembuatan
1. Planning: Set goals, understand the audience, and define requirements.
2. Analysis and Design: Design the layout, UX, and UI.
3. Development: Write the code, integrate CMS, and develop the front and backend.
4. Testing: Check functionality, usability, compatibility, security, and performance.
5. Deployment: Host the website, link the domain, and launch it.
6. Maintenance: Update content, fix bugs, monitor security, and maintain backups.
7. Iteration: Gather user feedback and continue making improvements over time.
Creating a website is an iterative process that involves ongoing development and optimization to ensure the website meets the user's needs and evolves according to business goals.
#web #website #life #cycle #pembuatan
### Rangkuman Tahapan Desain Web
1. Penentuan Tujuan dan Analisis: Tentukan tujuan dan lakukan riset.
2. Perencanaan: Buat sitemap dan wireframe.
3. Desain UI: Rancang tampilan visual yang menarik.
4. Desain UX: Fokus pada pengalaman pengguna.
5. Responsif dan Adaptif: Pastikan situs responsif di berbagai perangkat.
6. Pengumpulan Konten: Siapkan konten yang relevan.
7. Pengembangan dan Pengujian: Handover ke developer dan lakukan pengujian.
8. Penyempurnaan: Revisi desain berdasarkan masukan.
9. Peluncuran: Terapkan desain dan cek ulang.
10. Pemeliharaan: Update konten dan pantau kinerja situs.
Tahapan ini membantu memastikan desain web tidak hanya indah secara visual, tetapi juga mudah digunakan dan memenuhi kebutuhan pengguna serta tujuan proyek.
#desain #web #tahap #tahapan #design
1. Penentuan Tujuan dan Analisis: Tentukan tujuan dan lakukan riset.
2. Perencanaan: Buat sitemap dan wireframe.
3. Desain UI: Rancang tampilan visual yang menarik.
4. Desain UX: Fokus pada pengalaman pengguna.
5. Responsif dan Adaptif: Pastikan situs responsif di berbagai perangkat.
6. Pengumpulan Konten: Siapkan konten yang relevan.
7. Pengembangan dan Pengujian: Handover ke developer dan lakukan pengujian.
8. Penyempurnaan: Revisi desain berdasarkan masukan.
9. Peluncuran: Terapkan desain dan cek ulang.
10. Pemeliharaan: Update konten dan pantau kinerja situs.
Tahapan ini membantu memastikan desain web tidak hanya indah secara visual, tetapi juga mudah digunakan dan memenuhi kebutuhan pengguna serta tujuan proyek.
#desain #web #tahap #tahapan #design
### Expanded Summary: Pertemuan 7 - Installasi & Command Dasar GIT
---
### 📋 Introduction
This document provides an in-depth introduction to using Git for version control, from installation to mastering key commands. It is tailored for programmers who want to integrate Git into their workflows, with a focus on using Bitbucket as a repository hosting platform. Key areas covered include initializing repositories, managing commits, setting up secure connections with SSH keys, and using
---
### 🛠 Git Installation
Git is a widely used distributed version control system, and its installation is straightforward:
- Download: Access the official Git website ([git-scm.com](https://git-scm.com/downloads)) and download the appropriate installer for your operating system.
- Set Up Bitbucket Account: Create an account at [Bitbucket](https://bitbucket.org), prioritizing the use of professional emails for easier repository transfer in collaborative environments.
---
### 🔑 Setting Up SSH Keys for Secure Access
SSH keys enhance security by replacing traditional username-password authentication with cryptographic key pairs:
1. Generate SSH Key:
- Use
- Include a recognizable email and output filename (
2. Start SSH Agent:
- Activate the SSH agent with
3. Add Key to SSH Agent:
- Use
4. Configure SSH:
- Create or update the
5. Add Key to Bitbucket:
- Copy the content of the public key file (e.g.,
6. Test Connection:
- Confirm successful configuration with
---
### 📁 Initializing and Managing Repositories
#### Setting Up a Local Repository
- Use
#### Configuring Global Variables
- Set global variables to identify the user across all repositories:
#### Adding Files
- Use
- Add all files:
- Add specific files:
#### Committing Changes
- Commit regularly after completing features or fixing bugs. The command:
allows you to include meaningful descriptions for future reference.
---
### 🌐 Connecting and Syncing with Remote Repositories
#### Setting Up a Remote Repository
- Connect the local repository to a remote one using:
#### Synchronizing Changes
- Pull updates before pushing to avoid conflicts:
- Push changes to the repository:
---
### 🌲 Working with Branches
- Branching Basics: Branches help isolate features or experiments:
- Create a branch:
- Switch to a branch:
- Main Branch: The
---
### 📜 Excluding Files with
The
- Sensitive files like
- Large or generated directories like
---
### 🖥 Cloning Repositories and Viewing Changes
#### Cloning a Repository
- To replicate an existing repository, use:
#### Viewing Differences
- Inspect changes between your local files and the repository using:
---
---
### 📋 Introduction
This document provides an in-depth introduction to using Git for version control, from installation to mastering key commands. It is tailored for programmers who want to integrate Git into their workflows, with a focus on using Bitbucket as a repository hosting platform. Key areas covered include initializing repositories, managing commits, setting up secure connections with SSH keys, and using
.gitignore to optimize repository management.---
### 🛠 Git Installation
Git is a widely used distributed version control system, and its installation is straightforward:
- Download: Access the official Git website ([git-scm.com](https://git-scm.com/downloads)) and download the appropriate installer for your operating system.
- Set Up Bitbucket Account: Create an account at [Bitbucket](https://bitbucket.org), prioritizing the use of professional emails for easier repository transfer in collaborative environments.
---
### 🔑 Setting Up SSH Keys for Secure Access
SSH keys enhance security by replacing traditional username-password authentication with cryptographic key pairs:
1. Generate SSH Key:
- Use
ssh-keygen with the -t ed25519 -b 4096 flag for strong encryption.- Include a recognizable email and output filename (
bitbucket_work). 2. Start SSH Agent:
- Activate the SSH agent with
eval $(ssh-agent). 3. Add Key to SSH Agent:
- Use
ssh-add to register the private key, ensuring seamless access during operations like git push. 4. Configure SSH:
- Create or update the
.ssh/config file with the following:
     Host bitbucket.org
       AddKeysToAgent yes
       IdentityFile ~/.ssh/bitbucket_work
5. Add Key to Bitbucket:
- Copy the content of the public key file (e.g.,
bitbucket_work.pub) and add it to your Bitbucket account under SSH settings.6. Test Connection:
- Confirm successful configuration with
ssh -T git@bitbucket.org.---
### 📁 Initializing and Managing Repositories
#### Setting Up a Local Repository
- Use
git init to create a repository in a project folder. This command sets up a .git directory to track version history. #### Configuring Global Variables
- Set global variables to identify the user across all repositories:
  git config --global user.name "Your Name"
  git config --global user.email "your_email@example.com"
#### Adding Files
- Use
git add to stage files for a commit:- Add all files:
git add .- Add specific files:
git add filename. #### Committing Changes
- Commit regularly after completing features or fixing bugs. The command:
git commit -m "Commit message"
allows you to include meaningful descriptions for future reference.
---
### 🌐 Connecting and Syncing with Remote Repositories
#### Setting Up a Remote Repository
- Connect the local repository to a remote one using:
git remote add origin git@bitbucket.org:username/repo_name.git
#### Synchronizing Changes
- Pull updates before pushing to avoid conflicts:
git pull origin master
- Push changes to the repository:
git push --set-upstream origin master
---
### 🌲 Working with Branches
- Branching Basics: Branches help isolate features or experiments:
- Create a branch:
git branch branch_name- Switch to a branch:
git checkout branch_name. - Main Branch: The
master or main branch is typically used for live or production-ready code. ---
### 📜 Excluding Files with
.gitignore The
.gitignore file prevents unnecessary files from being included in the repository. Common examples include: - Sensitive files like
config.php. - Large or generated directories like
uploads/ or vendor/. ---
### 🖥 Cloning Repositories and Viewing Changes
#### Cloning a Repository
- To replicate an existing repository, use:
git clone https://username@bitbucket.org/username/repo_name.git
#### Viewing Differences
- Inspect changes between your local files and the repository using:
git diff
---
### 🔗 References and Resources
The document also links to comprehensive Git tutorials and setup guides:
- [Simplilearn Git Tutorial](https://www.simplilearn.com/tutorials/git-tutorial/git-tutorial-for-beginner).
- [Atlassian SSH Setup](https://support.atlassian.com/bitbucket-cloud/docs/set-up-personal-ssh-keys-on-windows/).
---
### 🏁 Conclusion
This training material offers a comprehensive foundation in Git, focusing on practical steps and essential commands to manage code repositories effectively. From installing Git to advanced SSH configurations, it emphasizes the importance of structured workflows and secure practices in collaborative environments. The integration with Bitbucket ensures robust repository management for professional projects.
By following these instructions, programmers can enhance their version control proficiency and streamline collaborative development efforts.
The document also links to comprehensive Git tutorials and setup guides:
- [Simplilearn Git Tutorial](https://www.simplilearn.com/tutorials/git-tutorial/git-tutorial-for-beginner).
- [Atlassian SSH Setup](https://support.atlassian.com/bitbucket-cloud/docs/set-up-personal-ssh-keys-on-windows/).
---
### 🏁 Conclusion
This training material offers a comprehensive foundation in Git, focusing on practical steps and essential commands to manage code repositories effectively. From installing Git to advanced SSH configurations, it emphasizes the importance of structured workflows and secure practices in collaborative environments. The integration with Bitbucket ensures robust repository management for professional projects.
By following these instructions, programmers can enhance their version control proficiency and streamline collaborative development efforts.
Bitbucket
Bitbucket | Git solution for teams using Jira
Bitbucket Cloud is a Git-based code and CI/CD tool optimized for teams using Jira.
https://www.xda-developers.com/manage-your-finances-with-firefly-iii/
#finansial #uang #free #open #source #self #host #duit #atur
#finansial #uang #free #open #source #self #host #duit #atur
XDA
Manage your finances like a pro with a self-hosted Firefly III server
Tired of paying for premium accounting tools? You can host Firefly III on your home lab to keep track of your finances