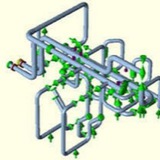
Modeling steps followed in Caesar II:
The modeling of buried piping is very easy if you have all the data at your hand. The following steps are followed for modeling:
The modeling of buried piping is very easy if you have all the data at your hand. The following steps are followed for modeling:
• From the isometric model the line in the same way as you follow in case of above ground pipe model i.e, enter line properties in Caesar Spreadsheet, enter lengths by breaking the line into several nodes or select an existing job for converting it into an underground model.
• Analyst can start the Buried Pipe Modeler by selecting an existing job and then choosing Input-Underground from the CAESAR II Main Menu. The Modeler is designed to read a standard CAESAR II input data file that describes the basic layout of the piping system as if it was not buried. From this basic input CAESAR II creates a second input data file that contains the buried pipe model. This second input file typically contains a much larger number of elements and restraints than the first job. The first job that serves as the “pattern” is termed the original job. The second file that contains the element mesh refinement and the buried pipe restraints is termed the buried job. CAESAR II names the buried job by appending a “B” to the name of the original job.
• When the Buried Pipe Modeler is initially started up, the following screen appears:
• Analyst can start the Buried Pipe Modeler by selecting an existing job and then choosing Input-Underground from the CAESAR II Main Menu. The Modeler is designed to read a standard CAESAR II input data file that describes the basic layout of the piping system as if it was not buried. From this basic input CAESAR II creates a second input data file that contains the buried pipe model. This second input file typically contains a much larger number of elements and restraints than the first job. The first job that serves as the “pattern” is termed the original job. The second file that contains the element mesh refinement and the buried pipe restraints is termed the buried job. CAESAR II names the buried job by appending a “B” to the name of the original job.
• When the Buried Pipe Modeler is initially started up, the following screen appears:
This spreadsheet is used to enter the buried element descriptions for the job. The buried element description spreadsheet serves several functions:
• Allows analyst to define which part of the piping system is buried.
• Allows analyst to define mesh spacing at specific element ends.
• Allows the input of user-defined soil stiffnesses.
From/ To node:-
Any element of pipe in CAESAR II can be define by two elements first is start point and second is end point. In buried pipe model, before conversion the From/ To nodes remains same as unburied model.
• Allows analyst to define which part of the piping system is buried.
• Allows analyst to define mesh spacing at specific element ends.
• Allows the input of user-defined soil stiffnesses.
From/ To node:-
Any element of pipe in CAESAR II can be define by two elements first is start point and second is end point. In buried pipe model, before conversion the From/ To nodes remains same as unburied model.
Soil model no:
This column is used to define which of the elements in the model are buried. A nonzero entry in this column implies that the associated element is buried. A 1 in this column implies that the analyst wishes to enter user defined stiffnesses, on a per length of pipe basis, at this point in the model. These stiffnesses must follow in column numbers 6 through 13. Any number greater than 1 in the soil model no. column points to a CAESAR II soil restraint model generated using the equations outlined later under Soil Models from analyst entered soil data.
This column is used to define which of the elements in the model are buried. A nonzero entry in this column implies that the associated element is buried. A 1 in this column implies that the analyst wishes to enter user defined stiffnesses, on a per length of pipe basis, at this point in the model. These stiffnesses must follow in column numbers 6 through 13. Any number greater than 1 in the soil model no. column points to a CAESAR II soil restraint model generated using the equations outlined later under Soil Models from analyst entered soil data.
From/ To mesh type:
A critical part of the modeling of an underground piping system is the proper definition of Zone 1 bearing regions. These regions primarily occur:
• On either side of a change in direction
• For all pipes framing into an intersection
• At points where the pipe enters or leaves the soil
CAESAR II automatically puts a Zone 1 mesh gradient at each side of the pipe framing into an elbow. Note it is the analyst’s responsibility to tell CAESAR II where the other Zone 1 areas are located in the piping system.
A critical part of the modeling of an underground piping system is the proper definition of Zone 1 bearing regions. These regions primarily occur:
• On either side of a change in direction
• For all pipes framing into an intersection
• At points where the pipe enters or leaves the soil
CAESAR II automatically puts a Zone 1 mesh gradient at each side of the pipe framing into an elbow. Note it is the analyst’s responsibility to tell CAESAR II where the other Zone 1 areas are located in the piping system.
User defined stiffness & ultimate load:
There are 13 columns in the spreadsheet. Column 6 to 13 carry the user defined soil stiffnesses and ultimate loads if analyst defines soil model 1. Analyst has to enter lateral, axial, upward, downward stiffnesses & loads.
There are 13 columns in the spreadsheet. Column 6 to 13 carry the user defined soil stiffnesses and ultimate loads if analyst defines soil model 1. Analyst has to enter lateral, axial, upward, downward stiffnesses & loads.
Procedure:
1. Select the original job and enter the buried pipe modeler. The original job must already exist, and will serve as the basis for the new buried pipe model. The original model should only contain the basic geometry of the piping system to be buried. The modeler will remove any existing restraints (in the buried portion). Add any underground restraints to the buried model. Rename the buried job if CAESAR II default name is not appropriate.
2. Enter the soil data using Soil Models.
3. Describe the sections of the piping system that are buried, and define any required fine mesh areas using the buried element data spreadsheet.
4. Convert the original model into the buried model by the activation of option Convert Input. This step produces a detailed description of the conversion.
5. Exit the Buried Pipe Modeler and return to the CAESAR II Main Menu. From here the analyst may perform the analysis of the buried pipe job.
The steps to create soil model and few other important considerations will be published in future posts on underground piping analysis.
1. Select the original job and enter the buried pipe modeler. The original job must already exist, and will serve as the basis for the new buried pipe model. The original model should only contain the basic geometry of the piping system to be buried. The modeler will remove any existing restraints (in the buried portion). Add any underground restraints to the buried model. Rename the buried job if CAESAR II default name is not appropriate.
2. Enter the soil data using Soil Models.
3. Describe the sections of the piping system that are buried, and define any required fine mesh areas using the buried element data spreadsheet.
4. Convert the original model into the buried model by the activation of option Convert Input. This step produces a detailed description of the conversion.
5. Exit the Buried Pipe Modeler and return to the CAESAR II Main Menu. From here the analyst may perform the analysis of the buried pipe job.
The steps to create soil model and few other important considerations will be published in future posts on underground piping analysis.
Reboiler notes:
1- Horizontal reboilers shall be as close to the tower as practical with a minimum amount of pipe and elbows. The piping shall be stress analyzed as soon as the layout is firm. Support and anchor points shall be established at this time.
2- The following information is required by the piping designer in order to layout thermal siphon reboilers:
2-1- The elevation of the tower tangent line above grade
2-2- The elevation of the first tray and the reboiler return line
2-3- The length of the reboiler tubes and the type of outlet on the reboiler on the exchangers
2-4- The dimension from the tangent line to the tubesheet on vertical exchangers and bottom of horizontal exchangers
2-5- Most of this information is shown on the flow diagrams, vessel and reboiler specifications. The design shall review the layout with the process engineer to ensure that complete agreement is reached
3- Avoid locating the reboiler return line under the downcomer. The top of the return line shall be a minimum of 12 inches below the bottom tray or 6 inches below the seal pan if the return line must be located under the downcomer.
4- Allow sufficient room for removing tube bundles on vertical reboilers. Allow sufficient room to remove shell cover to grade.
1- Horizontal reboilers shall be as close to the tower as practical with a minimum amount of pipe and elbows. The piping shall be stress analyzed as soon as the layout is firm. Support and anchor points shall be established at this time.
2- The following information is required by the piping designer in order to layout thermal siphon reboilers:
2-1- The elevation of the tower tangent line above grade
2-2- The elevation of the first tray and the reboiler return line
2-3- The length of the reboiler tubes and the type of outlet on the reboiler on the exchangers
2-4- The dimension from the tangent line to the tubesheet on vertical exchangers and bottom of horizontal exchangers
2-5- Most of this information is shown on the flow diagrams, vessel and reboiler specifications. The design shall review the layout with the process engineer to ensure that complete agreement is reached
3- Avoid locating the reboiler return line under the downcomer. The top of the return line shall be a minimum of 12 inches below the bottom tray or 6 inches below the seal pan if the return line must be located under the downcomer.
4- Allow sufficient room for removing tube bundles on vertical reboilers. Allow sufficient room to remove shell cover to grade.
These anchor blocks are designed to withstand the full thrust and pull forces due to thermal expansion and contraction and internal fluid pressure.
The size of these concrete anchor blocks needed to preclude movement are enormous, and in some cases several hundred cubic meters of concrete is required in remote desert locations for construction of these anchor blocks.
Forwarded from Piping Stress Analysis (PSA Group)
The overall vibration characteristics of the 60in flare header piping system, based on the first 15 modes, suggested concerns regarding the presence of maxima / minima and ‘Point of Inflections’ on the 60” section of the main header in the vicinity of Node-3383, which is location of actual failure that occurred during the failure incident. The current configuration of the sulfur lateral branch was also found to provide restraint to the 60" header, such that it is believed to impose unfavorable modes characteristics at the location of actual failure that occurred during the failure incident.
Forwarded from Piping Stress Analysis (PSA Group)
Mechanical vibration analysis is part of a Design Approach 3 of API 618, 5th edition. The scope includes calculating Mechanical Natural Frequencies (MNFs) throughout the system and a Forced Response Analysis to predict vibration and stress amplitudes, if necessary.
Forwarded from Piping Stress Analysis (PSA Group)
Accurate FE modeling, including
“super‐element” compressor frame
“super‐element” compressor frame